


A Guide to Ovate Pontics
Ovate or “egg-shaped” pontics are not new to the world of missing teeth replacement in traditional crown and bridge. First discussed in 1933, but didn’t become a popular design until many years later. The obvious advantages of an ovate pontic are aesthetic. The creation of a concave tissue profile and a convex pontic allow the illusion of emergence profile a root form where none exists. Pontics are ideally designed to be passive against the tissue.
Ovate Treatment Planning Considerations
Ovate pontics in contrast require a larger contact area with the tissue and light  pressure to form the tissue and papilla and create the appropriate gingival esthetics. Another consideration is that ovate pontics require an adequate thickness of tissue and width of the ridge. Achieving this may necessitate a surgical augmentation. Even with these challenges you will likely find that your patients do not resist the idea of surgical augmentation in order to create a more aesthetic result.
 By creating the ovate pontic site yourself, you are able to guide the tissue maturation by using the provisional restoration. Much like with implant aesthetics we have some measure of control of papilla form and height and labial gingival position as a result of the shape of the provisional under the tissue.
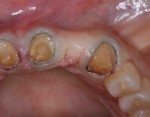
Ideal, you want 1mm base of tissue under the provisional and over the ridge. If you aim for the base of the pontic to be 3mm from the free gingival margin on the labial, if you have less depth your ability to alter tissue profile diminishes. With the patient anesthetized you can sound to bone over the pontic site to determine if we have adequate tissue thickness.
Ovate pontic sites can be created with a round diamond in a high speed handpiece. The CO2 laser or Erbium Yag Laser are also options to achieve minimal to no bleeding allowing ease of temporary cementation, quick healing and very little post operative discomfort for the patient.
STEP BY STEP OVATE
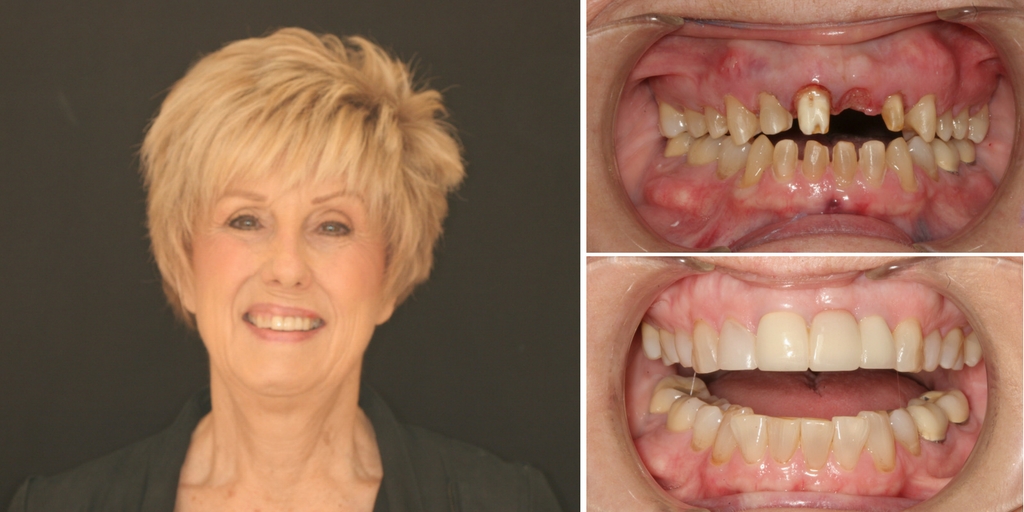
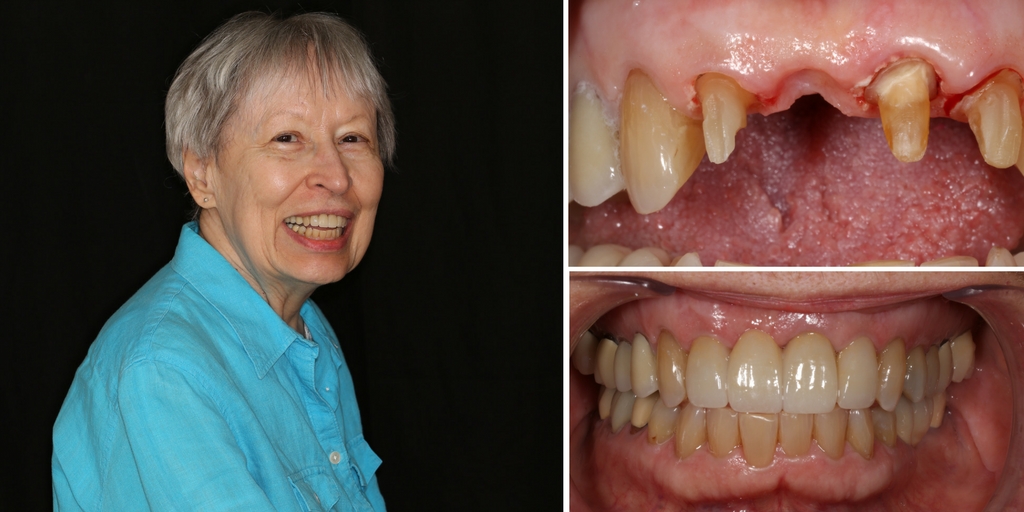
Take an impression of the site and prepare the ovate pontic site on a model first. Then fabricate the provisional indirectly, or add to an existing temporary to create the ovate pontic on the model. With the provisional in hand, go to the mouth and begin to remove the tissue for the pontic. Reseat the provisional and continue to remove tissue until you no longer have blanching. Now cement the provisional, and allow the appropriate 6-12 weeks for healing and tissue maturation before final impressions.

By Dr. John Nosti


