In the Op Learning: Planning for Symmetry in Smile Design
 I was privileged to present a 2 day live patient program called Anterior Aesthetics live in Miami in March. In this program, I prepare one patient and seat another so that attendees get from A to Z a predictable approach to achieving exquisite aesthetics in all of their cases.
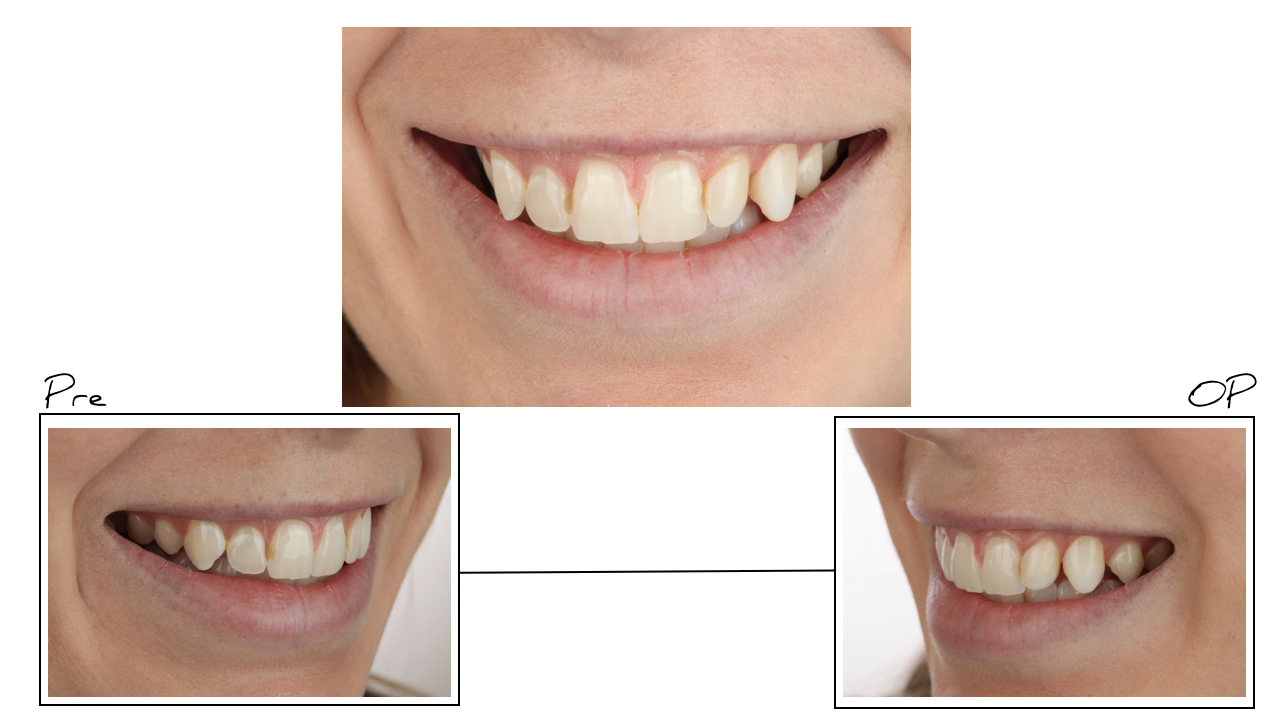
This is the follow up, to the case I prepped and the results. I wanted to share with all the doctors that have been following this case and welcome any questions you may have!
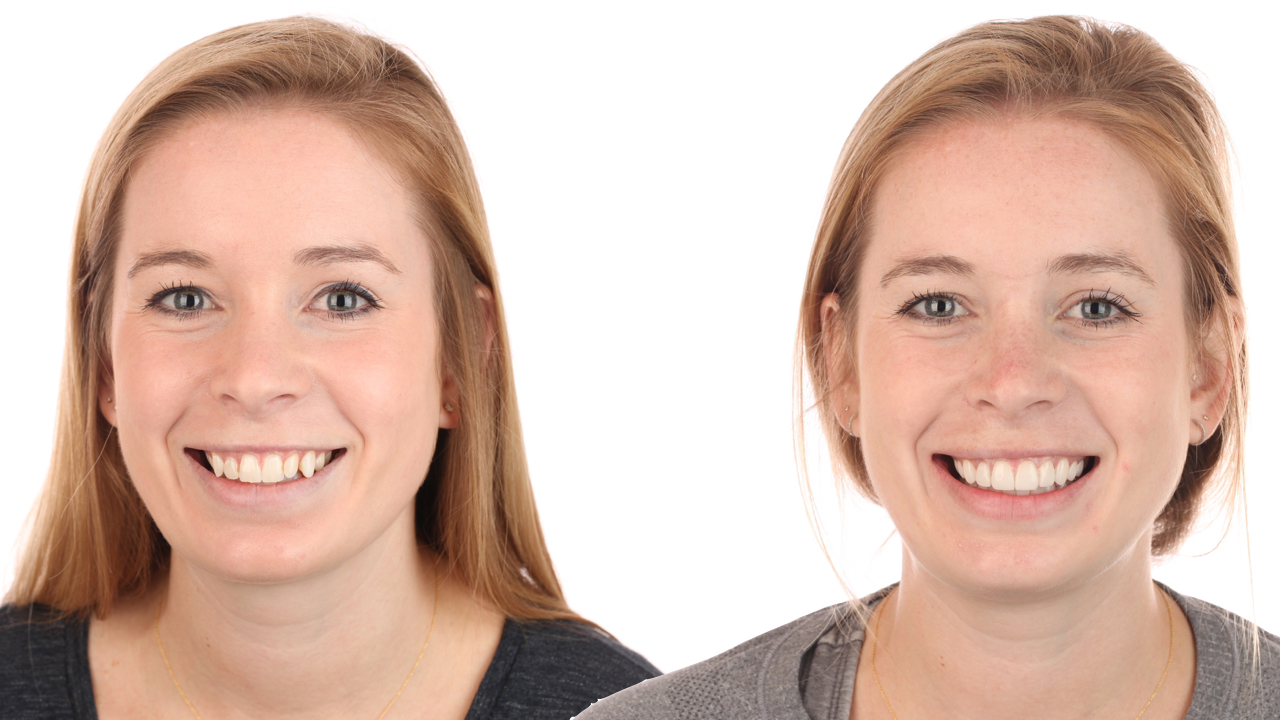
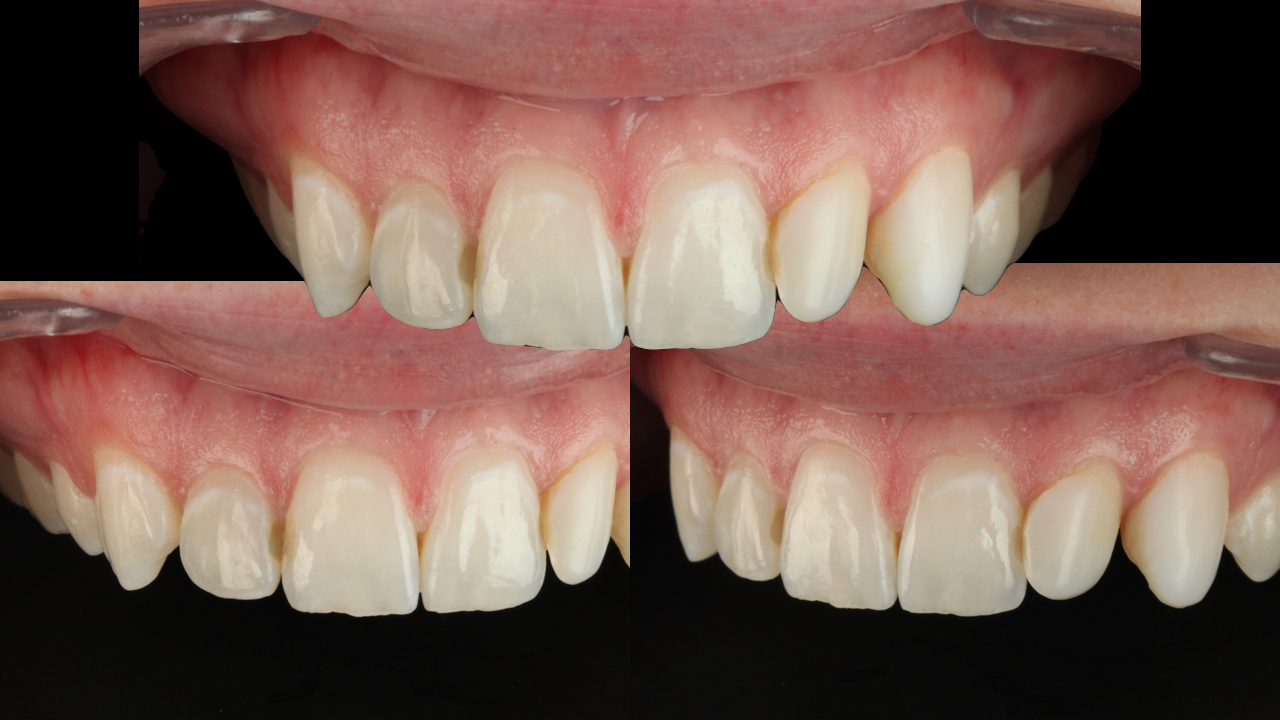 Stephanie was a young professional who desired less canine dominance and more symmetry in her smile. We needed to address the inter proximal decay and discuss treatment options. Unwilling to pursue a combination orthodontics plan as an option, she accepted a treatment plan of #4-13 in e.Max.
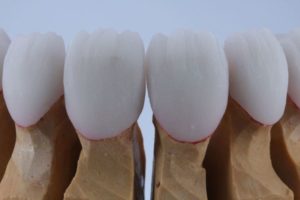
Designing her smile based on ideal incisal edge position was the first step in determining 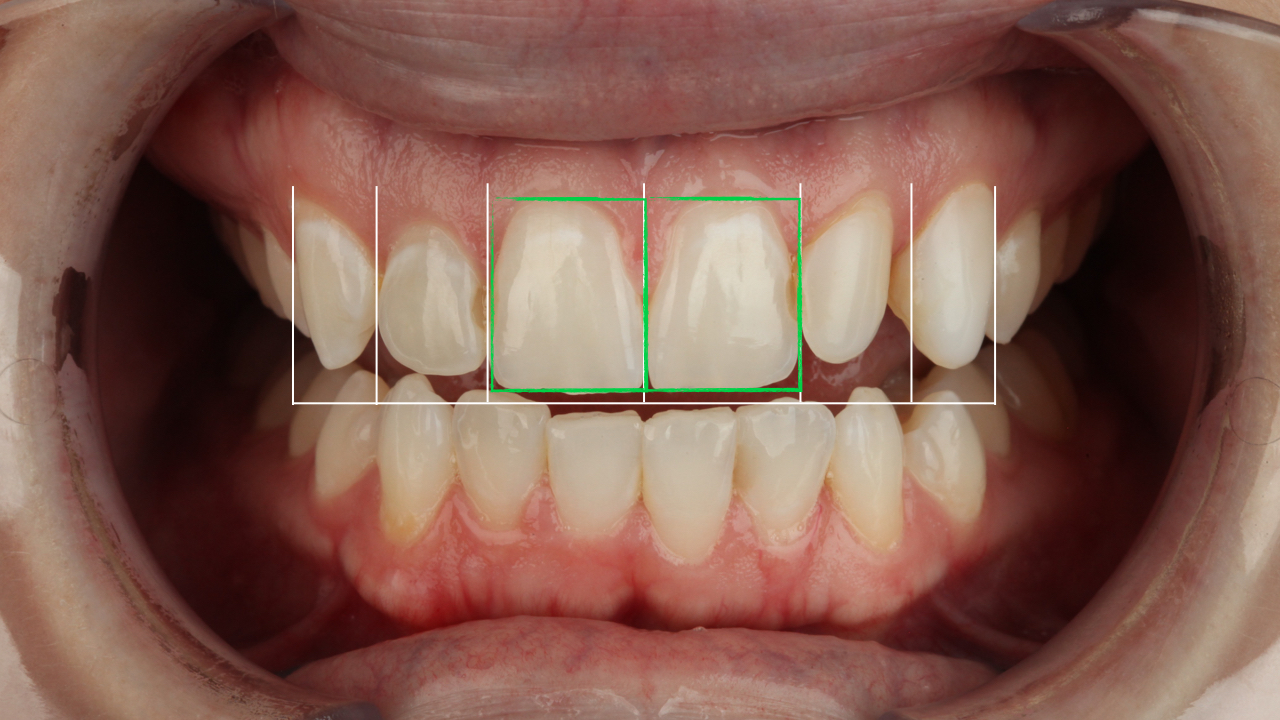 length and appropriate dimensions for her final design. As a rule in my aesthetic cases, I prescribe a Diagnostic Wax Up Kit for 2 reasons, 1) to ensure my patient and I are on the same page regarding shapes, lengths, embrasures and texture and 2) to determine the exact amount of reduction required for the ceramist to provide the most aesthetic option. My goal in
 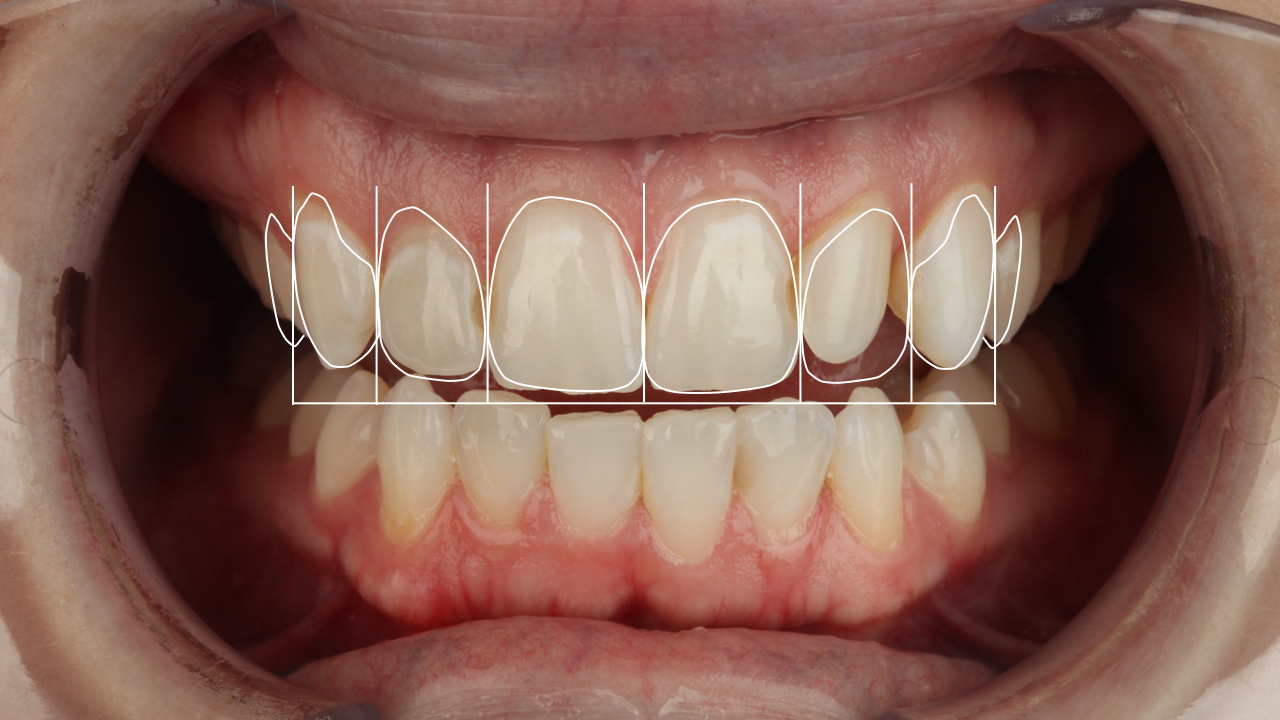 preparation design is to be precise in removing what is required, and also
developing a design that minimizes fracture and maximizes aesthetics. This is all accomplished with a Diagnostic Wax Up Kit. (Click here for a free technique guide on how to use this kit).
When treatment planning her case, here was my problem list:
– Interproximal decay 7,8, 9, 10
– Dominant canines
– Rotated #7, shorter than #10
– Tissue assymetry between #7 and #10
– Deficient buccal corridor each side
– Smile line discrepancy
I made a decision based on incisal edge display at rest that Stephanie’s incisal position of #6, 8, and 9 should stay in the same position pre-operatively. By gaining some tissue height, with some slight soft tissue contouring, I was able to correct gingival symmetry.
Once the diagnostic wax up was received, we utilized the preparation reduction guides to achieve ideal reduction. This is done in part by creating a bisacryl overlay using a 2 stage matrix fabricated from the laboratory wax-up, and preparing through that mock up with specific prep reduction burs.
I’m happy to report that Stephanie’s seat was easy and unremarkable. The patient loved the result!

We look forward to another awesome program October 14, 15th 2016 in Englewood Cliffs, NJ (just outside of Manhattan). For more information, contact Pete@clinicalmastery.com or call 480.489.5551.


Do you take any photos with teeth in occlusion and retracted, so we can see how deep the overbite is?
When you do a case like this, and it looks like there is no occlusal issues, do you still want to mount in CR and equilibrate from the MI position? If not will you talk about why you choose not to? thanks and look forward to seeing the final case.